3D Printing & Building Spectrografs
As I step into bulding the single components of the FLECHAS (as developed by the CAOS group, it turns out that producing all the minor pieces by classical mechanical processing using a lathe and/or a milling machine creates a lot of effort. This page will be updated as new results / experiences available.
So it came to my mind, is there a different opportunity to create the single components. Keeping in mind that most of the inner parts of the fiber head as well of the spectrograf have less mechanical stress, why not using 3D-printing technology to create them?
So step 1: - get in touch with 3D printing.
I learned about the different type of 3D printer, advantages and disadvantages of the different printing technologies in use. After a certein evaluation time, I come to the conclusion that a DLP printer, which in the last months prices of them come into a range which let me give them a try. Essentially currently (March 2018) their are only to type of printing technology in the price segement of below 1000 Euro's: the FDM and the DLP printers. Both printer type are create the 3D object to be printed on single layer basis. For me the major argument was the printing resolution and the surface quality (which might for threads important) - so I decided to select a DLP type printer. The clear disadvantage of this type is the handling. As printing medium a resin is used which is converted into a stable form by UV exposure. This resin has some toxic properties - so handling has to be done very careful.
Some days ago the WANHAO Duplicator 7 DLP 3D printer with control box to use the printer in stand alone mode without blocking the notebook. Before get into the real creation of the required parts some learning and tests have to be performed. In worst case, if the printed objects will not fullfill the required, the printer be selled.
My first test is to find out a stable printing. I tried to create simple cube:
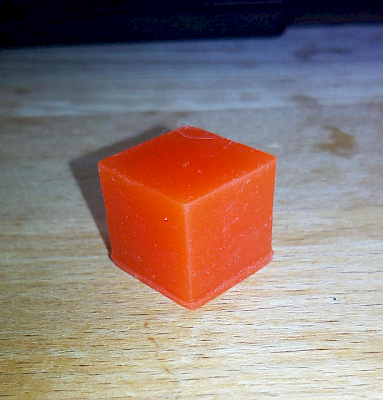 |
Test cube, size nomial 15mm printed at stepsize 100µ. 5 Baseplate layer exposure time: 200s each. Total number of layers: 150 Time to print about 150min Baselayers looks wired. Real size of the cube: 15.75 x 15.85 x 14.85 mm |